Эта функция доступна только на тарифных планах Business и выше .
Мощная платформа атрибуции Revroute позволяет понять, насколько эффективно ваши ссылки конвертируются в реальных пользователей и доход.
В этом руководстве мы узнаем, как отслеживать события конверсий с Revroute, используя серверное отслеживание.
Рекомендуемый способ отслеживания конверсий в Revroute — серверное отслеживание, которое более надёжно, чем клиентское отслеживание.
Шаг 1: Включите отслеживание конверсий для ваших ссылок
Шаг 2: Установите скрипт Revroute Analytics
Далее необходимо установить скрипт Revroute Analytics.
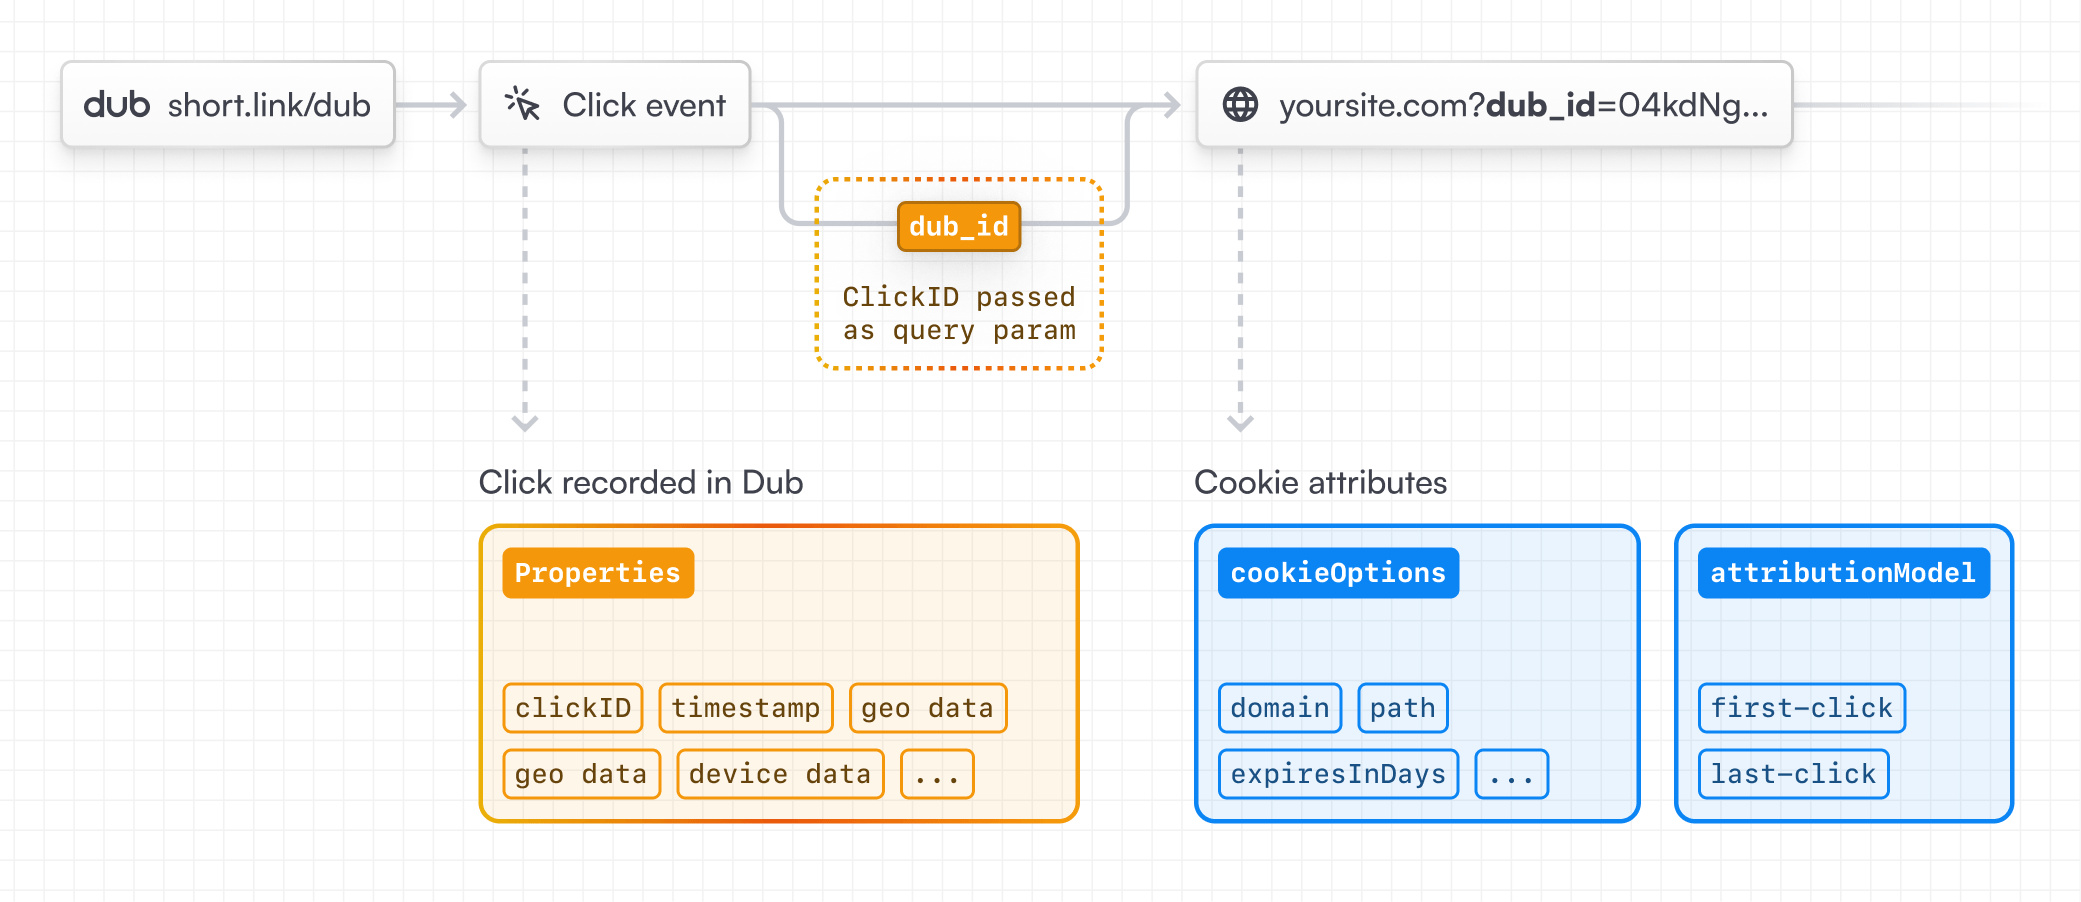
Этот скрипт обнаруживает параметр запроса dub_id и сохраняет его как first-party cookie, который будет использоваться для атрибуции последующих событий конверсий исходной ссылке.
Шаг 3: Установите серверный SDK Revroute
В зависимости от используемого фреймворка вы можете использовать наши нативные SDK для отслеживания событий конверсий:
TypeScript
Библиотека TypeScript для Revroute API
Go
Библиотека Go для Revroute API
Python
Библиотека Python для Revroute API
Ruby
Библиотека Ruby для Revroute API
PHP
Библиотека PHP для Revroute API
Если вы используете фреймворк, которого нет в списке, можно использовать REST API Revroute для отслеживания событий на стороне сервера:
Шаг 4: Отслеживайте события конверсий
Теперь самое интересное — отслеживание событий конверсий.
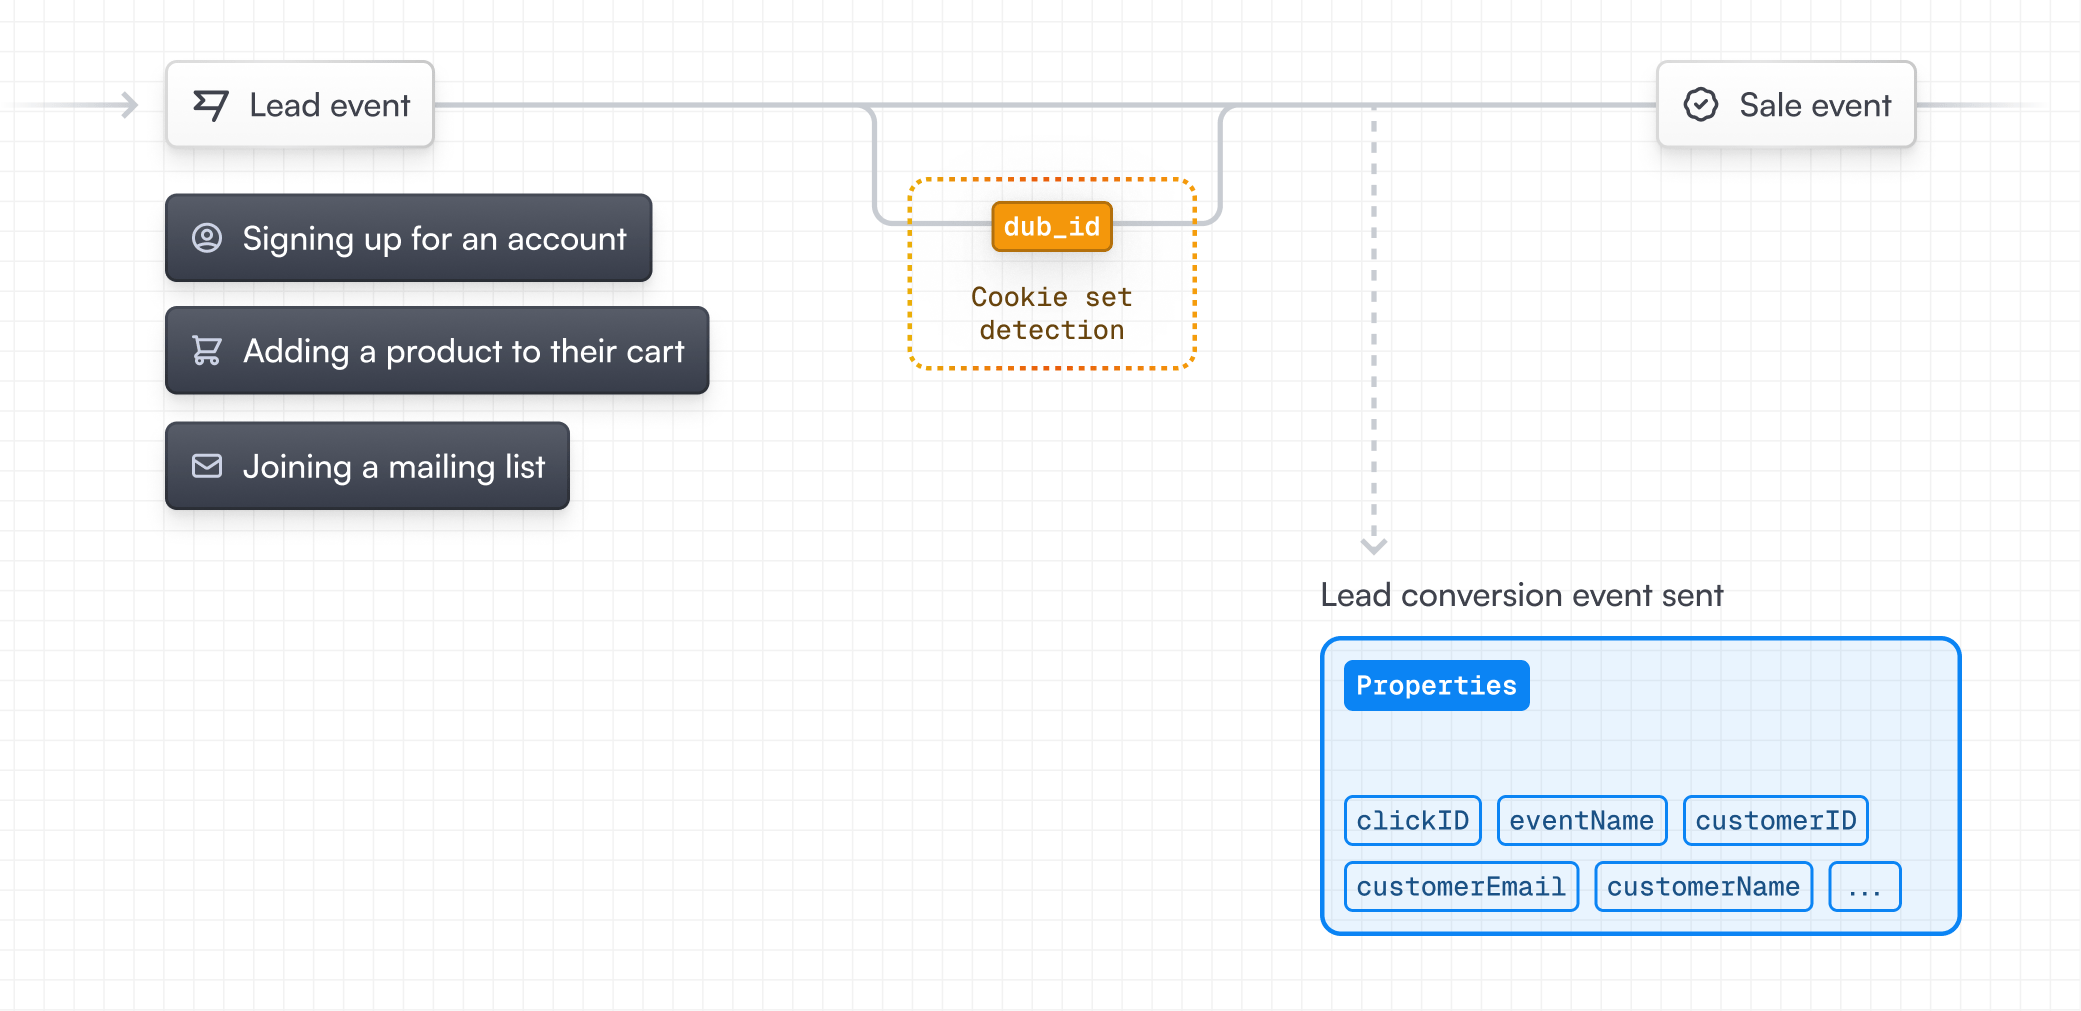
Отслеживание событий лидов
Первое событие, которое нужно отслеживать — это событие lead. Оно происходит, когда пользователь выполняет действие, указывающее на интерес к вашему продукту или услуге. Это может быть:
- Регистрация аккаунта
- Добавление товара в корзину
- Подписка на рассылку
Наиболее распространённое событие лида — Sign Up, которое происходит при регистрации пользователя. В зависимости от используемого фреймворка аутентификации, вот несколько примеров отправки событий лида Sign Up:
Событие лида служит источником истины для идентификации клиента и определения ссылки, по которой он пришёл. Это означает, что все последующие действия клиента (например, повышение тарифа, покупка продукта) будут автоматически атрибутированы исходной ссылке.
Отслеживание событий продаж
Второе событие, которое нужно отправить — это событие sale. Оно происходит, когда пользователь покупает ваш продукт или услугу. Это может быть:
- Подписка на платный план
- Расширение использования (переход с одного плана на другой)
- Покупка продукта
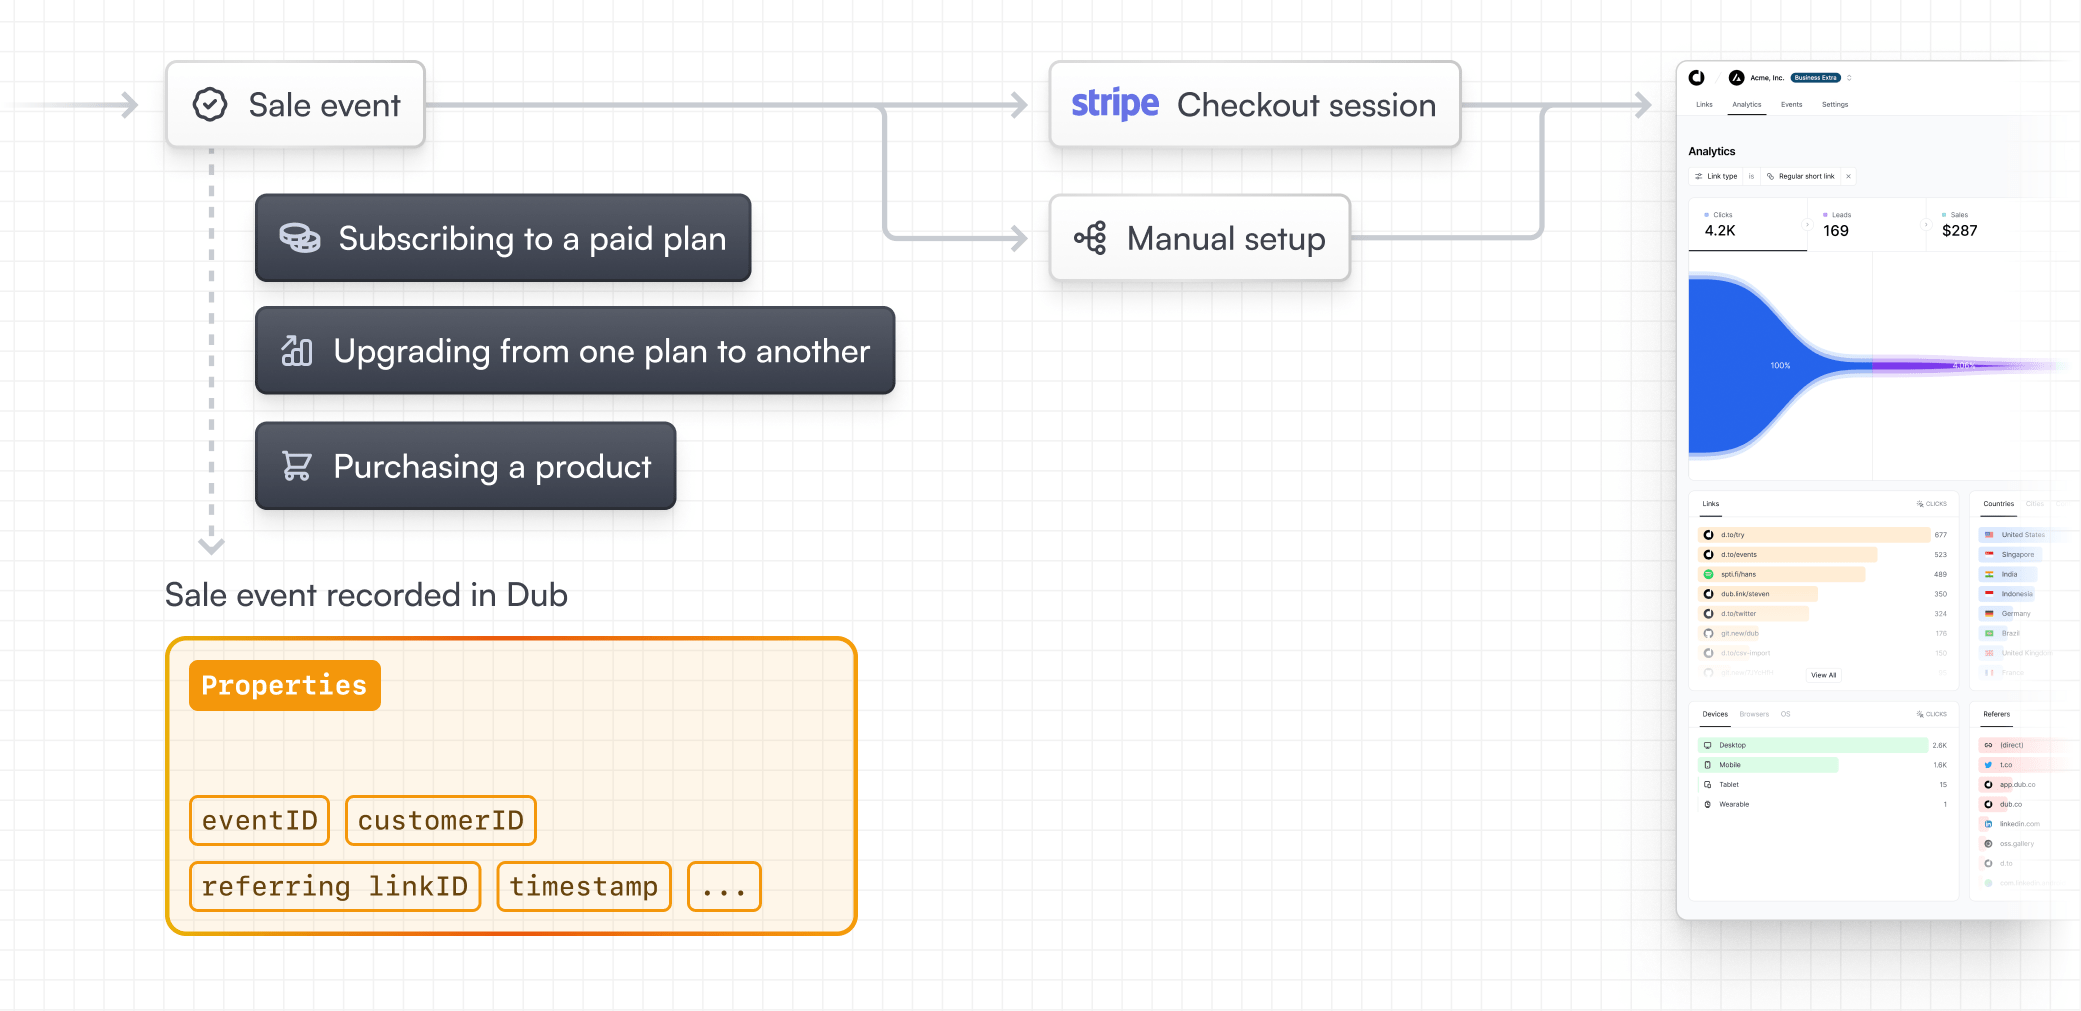
Отправляйте события продаж с бэкенда после успешной оплаты через наши SDK или эндпоинт API POST /track/sale. Чаще всего track/sale вызывают из обработчика webhook’а биллинга (например, payment.succeeded от ЮКассы или ваш собственный внутренний webhook).
Хотите отслеживать продажи без предварительного события лида? Передайте
clickId напрямую вместе с данными клиента при вызове track/sale — полный
список полей см. в API
Reference.
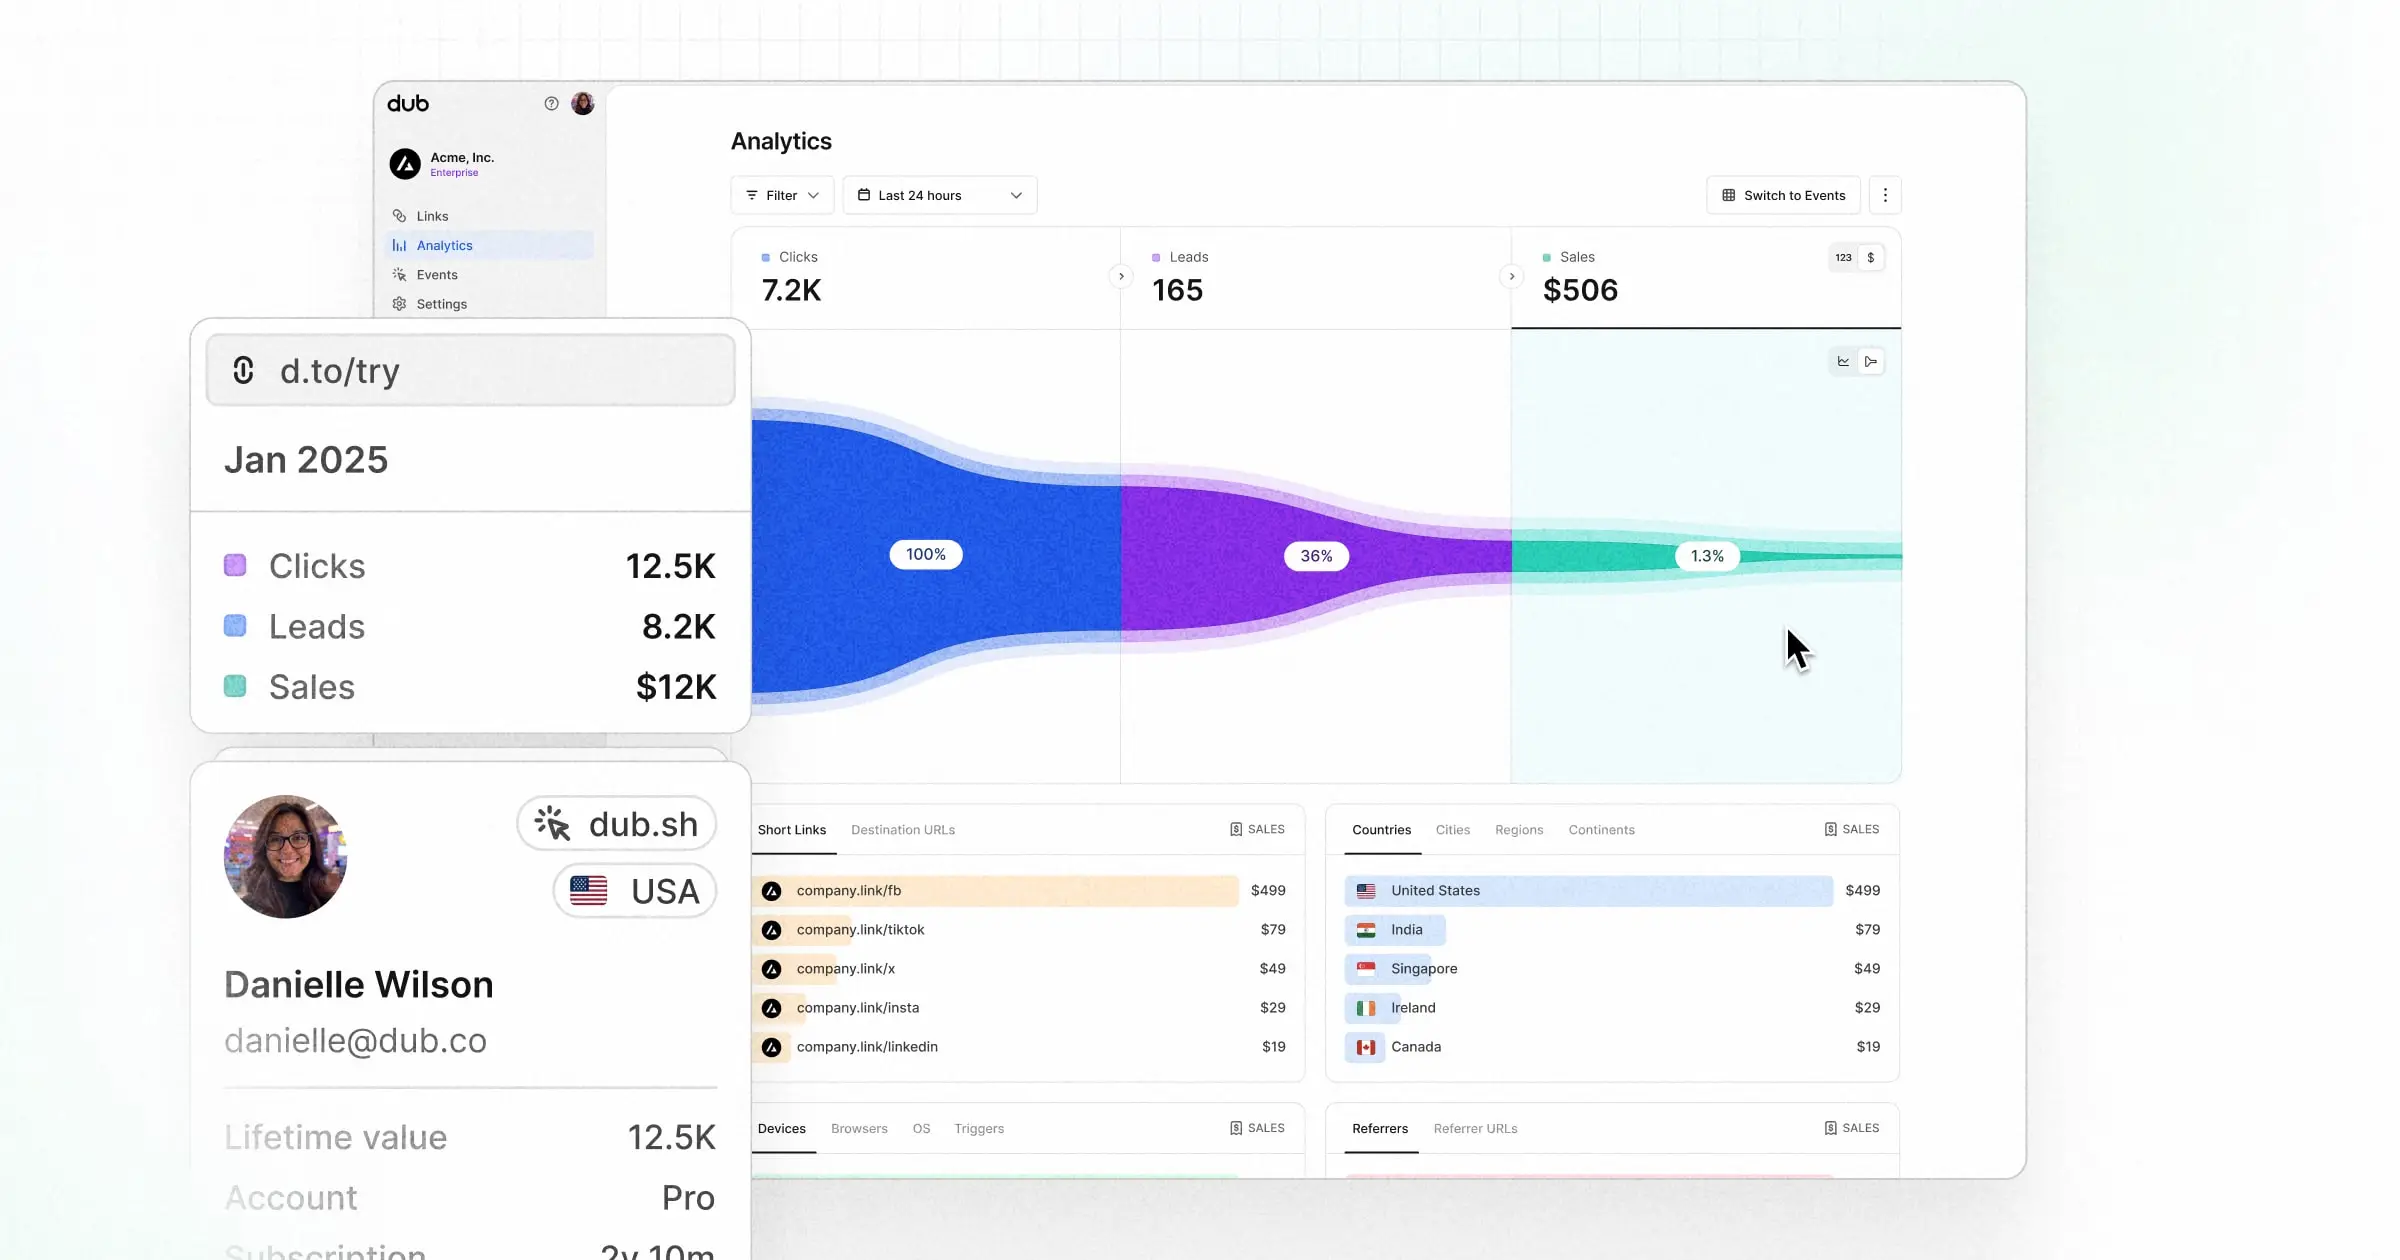
Шаг 5: Просмотрите ваши конверсии
После включения отслеживания конверсий для ваших ссылок все отслеженные конверсии будут отображаться в дашборде аналитики . Мы предоставляем 3 различных представления для анализа ваших конверсий: